
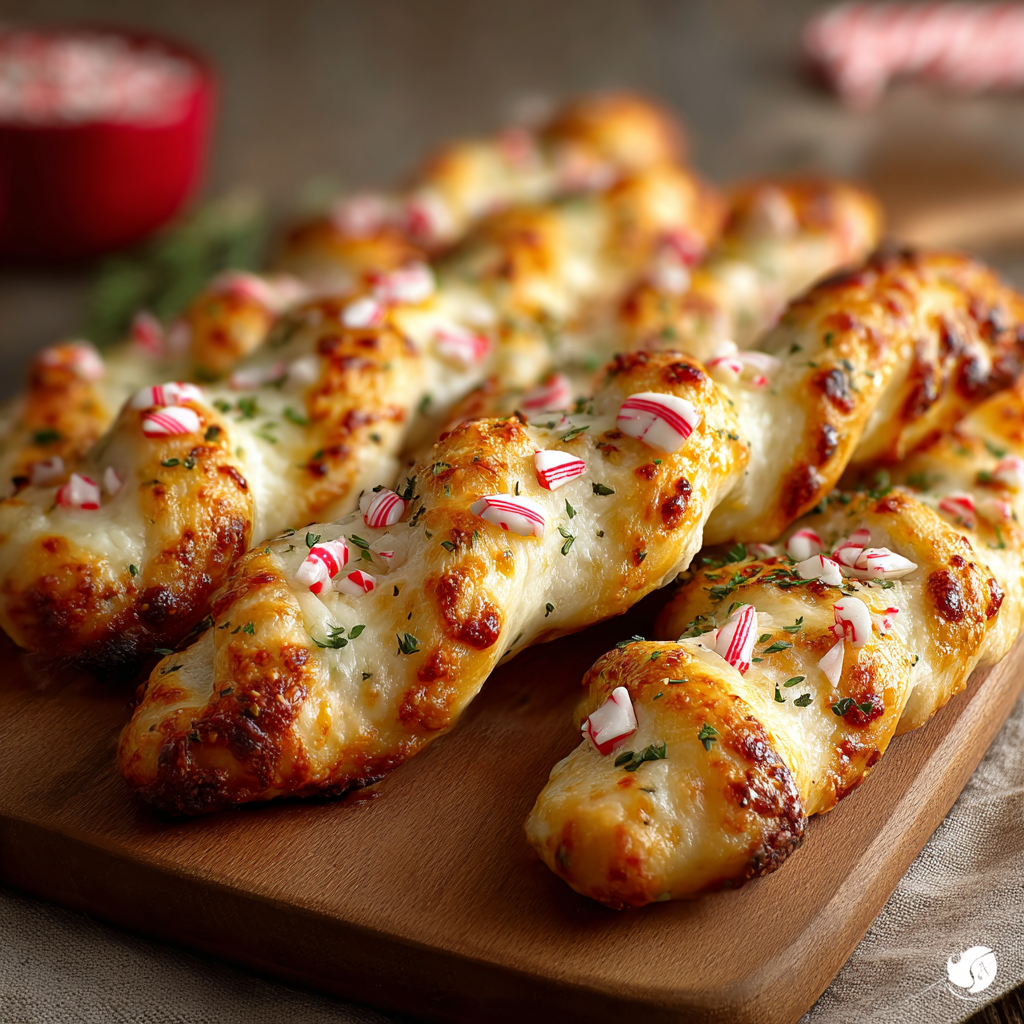
Candy Cane Pizza Bread Sticks

Festive candy cane–shaped pizza bread sticks with melty mozzarella, bright marinara, and an herby finish—an easy holiday starter or snack the whole family love.

This playful Candy Cane Pizza Bread Sticks idea began as a last-minute holiday experiment the year my sister asked for a savory appetizer that still felt festive. I had a can of refrigerated pizza dough, a jar of thick marinara, and a tub of whole-milk shredded mozzarella on the counter. After shaping the dough into a whimsical candy-cane hook and filling it with cheese and sauce, everyone at the party lined up for seconds. The combination of crisp golden dough, bubbling cheese that tethers in strings when you pull a stick apart, and the bright tomato center makes these irresistible for kids and grown-ups alike.
I love how approachable this is: you can throw it together with pantry staples and a few minutes of hands-on shaping. The dough stays tender when you avoid overworking it, the marinara adds acidity to cut through the richness of the cheese, and a quick brush of olive oil yields an attractive sheen and faster browning. Every time I make them they disappear in under 20 minutes; they’ve become my go-to appetizer for holiday parties, school functions, and impromptu movie nights when we want something shareable and warm.
Why You'll Love This Recipe
- Fast and crowd-pleasing: ready from start to oven in about 15 minutes and baked in 10 to 14 minutes—perfect when you need a quick appetizer.
- Minimal ingredients: uses refrigerated pizza dough, jarred marinara, and shredded mozzarella—pantry and fridge staples for easy assembly.
- Festive presentation: the candy-cane twist elevates a simple snack into a holiday centerpiece without extra effort.
- Adaptable and forgiving: swap cheeses, make smaller or larger sticks, or prepare ahead to bake just before serving.
- Kid-approved and shareable: handheld, cheesy, and perfectly portioned for parties or lunchboxes.
In my experience these get rave reviews from picky eaters because the form is fun and the flavors are familiar. They’re also great for testing fillings—try a little pepperoni tucked in or a smear of pesto for a twist. Family members have called them the most inventive thing on my party table, and I enjoy how simple technique—pairing, twisting, and sealing—creates such a festive result.
Ingredients
- Refrigerated pizza dough: 1 (13.8-ounce) can, room temperature (for example, Pillsbury). Look for a dough labeled for pizza or rolls; bring it to room temperature about 10 minutes before shaping so it stretches without springing back.
- Marinara sauce: 1/2 cup of a thick jarred variety such as Rao's. Choose a sauce with good tomato flavor and low water content so it doesn’t make the dough soggy—thicker sauces cling to the cheese and brown edges better.
- Shredded mozzarella cheese: 1 cup, whole-milk preferred. Pre-shredded cheese saves time but freshly shredded from a block yields better melt and less anti-caking powder.
- Dried oregano: 1/2 teaspoon. Adds a classic Italian herb note—use more for a pronounced herbal finish.
- Olive oil: 1 tablespoon extra virgin. Brushing the exterior encourages golden color and a subtle fruity flavor; you can use melted butter for a richer finish.
- Fresh thyme or basil: A few sprigs for garnish (optional). Fresh herbs brighten the final dish and add color contrast when sprinkled just before serving.
Instructions
Preheat and rest dough: Preheat the oven to 425°F and line a baking sheet with parchment paper. Allow the refrigerated dough to sit at room temperature for about 10 minutes; this relaxes the gluten and makes it easier to stretch into shape without tearing. While the oven heats, set up a lightly floured surface to prevent sticking. Shape base rectangle: On the lightly floured surface, unroll and gently press the dough into a roughly 10 by 8-inch rectangle. Avoid overworking the dough—press and stretch with your fingertips rather than rolling aggressively to maintain a tender crumb. If the dough resists, let it rest an additional 5 minutes to relax. Top with sauce and cheese: Spoon 1/2 cup of marinara into the center of the rectangle and spread thinly, leaving a 1/2-inch border all around to create a seal and prevent leakage while baking. Sprinkle 1 cup shredded mozzarella evenly over the sauce; less cheese near the edges reduces spillover and ensures neat shaping. Cut and twist: Using a sharp knife or pizza wheel, cut the rectangle into 8 lengthwise strips. Pair two strips, press the ends together to seal, then twist gently into a spiral. Curve the top end into a candy cane hook and press the tail end to seal the filling inside. Work methodically—sealing the ends prevents cheese from oozing during baking. Brush and season: Brush each formed stick lightly with 1 tablespoon olive oil and sprinkle a light dusting of 1/2 teaspoon dried oregano across all the sticks. Arrange them on the prepared sheet with at least 1 inch between sticks to allow for expansion; the oil promotes even browning and an attractive finish. Bake and rest: Bake in the preheated 425°F oven for 10 to 14 minutes, watching for a deep golden crust and bubbling cheese. If the tips brown too quickly, tent loosely with foil. Remove from oven and let them rest for 3 to 5 minutes so the cheese stabilizes, then garnish with fresh thyme or basil and serve warm.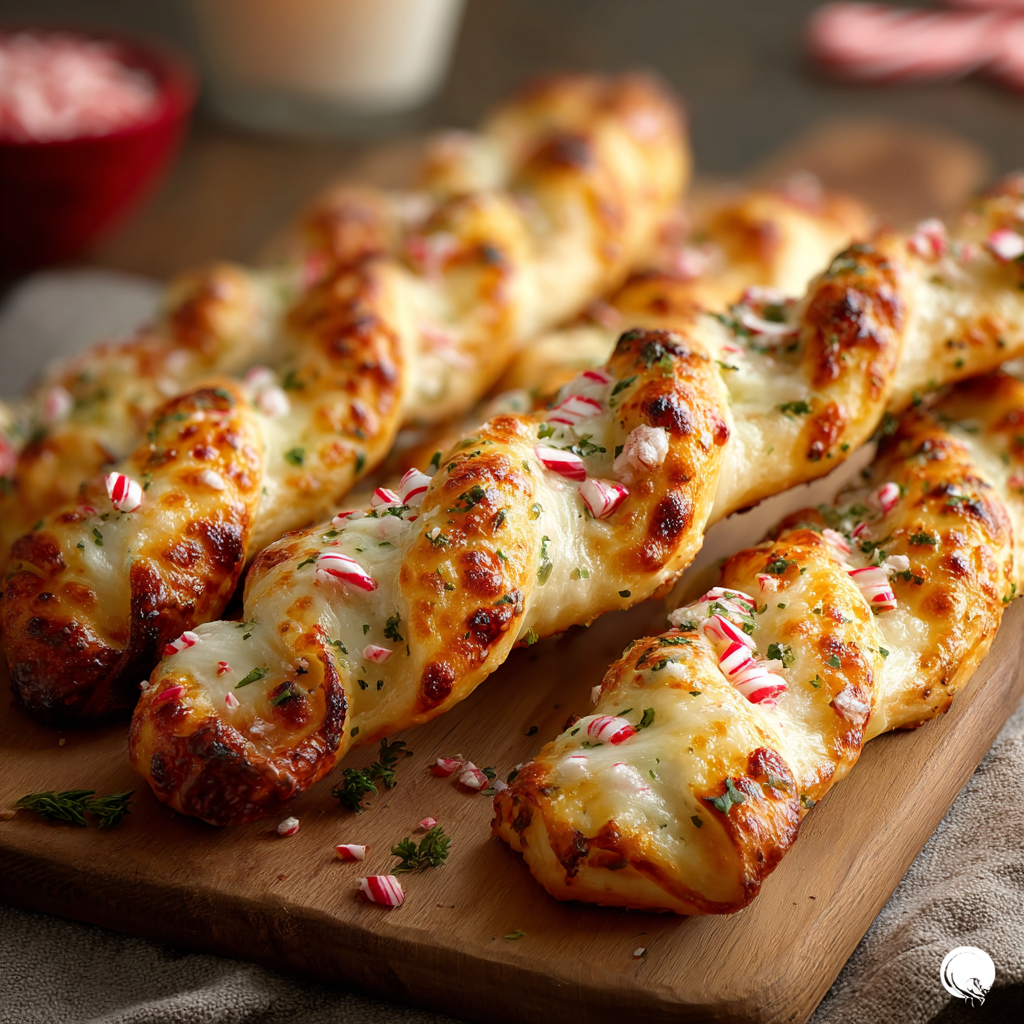
You Must Know
- These are best eaten fresh: cheese texture and dough crispness are optimal right after a 3–5 minute rest off the oven.
- Freeze unbaked sticks for up to 3 months on a sheet tray, then transfer to a bag; bake from frozen adding 4–6 minutes to bake time (tent if browning too fast).
- High in protein and calcium thanks to whole-milk mozzarella, but they contain wheat and dairy—store and label accordingly.
- Use a thick marinara to avoid soggy dough; if your sauce is thin, simmer briefly to reduce liquid before using.
What I love most is how a simple technique makes a routine snack instantly festive. Family members remember the first time we served these at a holiday brunch—kids chased each other around the table with their hooks held proudly. They’re the kind of thing you can scale up quickly for a crowd or miniaturize for bite-sized party nibbles.
Storage Tips
Store leftovers in an airtight container in the refrigerator for up to 3 days. To reheat and restore crispness, place on a baking sheet in a 375°F oven for 6–8 minutes until warmed through and edges re-crisp. Avoid microwaving as it softens the crust. To freeze, flash-freeze unbaked shaped sticks on a sheet tray until firm, then transfer to a freezer bag; bake directly from frozen at 425°F adding a few minutes until golden and bubbling.
Ingredient Substitutions
If you want a lighter option, substitute part-skim shredded cheese; expect slightly less richness and a different melt quality. For a gluten-free approach, use a store-bought GF pizza dough—texture will vary and baking time may change, so watch closely. Swap the marinara for a pesto or white garlic sauce for a different flavor profile; if using a watery tomato sauce, simmer to concentrate flavors and reduce moisture. For herb variation, use Italian seasoning instead of oregano.
Serving Suggestions
Serve warm alongside a small bowl of extra marinara for dipping or glass bowls of flavored olive oil with a pinch of chili flakes. Garnish with torn basil leaves or thyme sprigs for a fresh pop of color. Pair with a crisp salad or roasted vegetables for an easy weeknight dinner, or place on a festive platter for holiday entertaining. For a brunch twist, accompany with a green herb yogurt dip or honey butter for contrast.
Cultural Background
Handheld bread filled with cheese and tomato echoes classic Italian-American comfort foods—think pizza and stromboli— adapted into a whimsical shape for seasonal cheer. Pull-apart and filled breads have long been part of communal dining traditions, where shareable bites create convivial eating moments. This riff leans on pizza fundamentals while embracing playful presentation; shaping techniques feel modern but rest on timeless baking practices.
Seasonal Adaptations
In winter, boost holiday flavors by adding finely chopped roasted red peppers or a sprinkle of smoked paprika for warmth. For summer gatherings, fold in sun-dried tomatoes and fresh basil to brighten the filling. At Halloween, shape into hooks or witches’ fingers with a touch of black sesame on the ends. The dough responds well to seasonal cheeses—try smoked mozzarella in colder months for a cozy profile.
Meal Prep Tips
For easy entertaining, shape sticks the day before and refrigerate them on a parchment-lined sheet tray covered loosely with plastic; bring to room temperature before brushing with oil and baking. Alternatively, freeze shaped sticks flat and bake directly from frozen to save time on party day. Keep a bowl of warm marinara ready on the side so guests can customize their dipping experience.
These candy cane–shaped bread sticks strike a rare balance: comforting, playful, and practical. Whether you make them for a festive spread or a weeknight snack, they invite conversation—and seconds. Try them once and you’ll find plenty of excuses to shape dough into happy hooks.
Pro Tips
Bring dough to room temperature for easier stretching and less spring-back.
Use a thick marinara and avoid excess cheese near the edges to prevent spillover.
Brush with oil just before baking to promote even browning and a glossy finish.
Seal the ends well after twisting to keep cheese from leaking during baking.
This nourishing candy cane pizza bread sticks recipe is sure to be a staple in your kitchen. Enjoy every moist, high protein slice — it is perfect for breakfast or as a wholesome snack any time.
FAQs about Recipes
Can I freeze these before baking?
Yes. You can freeze shaped, unbaked sticks for up to 3 months on a sheet tray, then transfer to a freezer bag. Bake from frozen adding 4–6 minutes to the bake time.
What if my marinara is watery?
Use a thick marinara such as Rao's or simmer a thinner sauce to reduce water content. Thin sauce may make the dough soggy.
Tags
Candy Cane Pizza Bread Sticks
This Candy Cane Pizza Bread Sticks recipe makes perfectly juicy, tender, and flavorful steak every time! Serve with potatoes and a side salad for an unforgettable dinner in under 30 minutes.
Ingredients
Main
Instructions
Preheat and rest dough
Preheat oven to 425°F and line a baking sheet with parchment. Allow the refrigerated dough to sit at room temperature about 10 minutes to relax the gluten before shaping.
Shape base rectangle
On a lightly floured surface, unroll and gently press dough into a roughly 10 by 8-inch rectangle, avoiding overworking to keep the dough tender.
Top with sauce and cheese
Spread 1/2 cup marinara in the center leaving a 1/2-inch border, then sprinkle 1 cup shredded mozzarella evenly, keeping cheese away from the edges.
Cut and twist
Cut the rectangle into 8 lengthwise strips. Pair two strips, press ends together, twist into a spiral and curve the top into a candy cane hook, sealing the tail end.
Brush and season
Brush each stick lightly with 1 tablespoon olive oil and sprinkle with 1/2 teaspoon dried oregano. Arrange with space for expansion on the prepared sheet.
Bake and rest
Bake at 425°F for 10 to 14 minutes until golden and cheese is bubbly. Let rest 3 to 5 minutes, then garnish with thyme or basil before serving.
Last Step: Please leave a rating and comment letting us know how you liked this recipe! This helps our business to thrive and continue providing free, high-quality recipes for you.
Nutrition
Did You Make This?
Leave a comment & rating below or tag
@snapyrecipe on social media!
Categories:
You might also like...

5-Minute Thanksgiving Appetizers That Wow Every Guest
A fast, elegant bite for Thanksgiving: creamy cheese, bright cranberry, crunchy pecans and rosemary on crackers or baguette — ready in five minutes and loved by all.

Air Fryer Bang Bang Chicken Skewers
Crispy air-fried chicken skewers tossed in a creamy, sweet-spicy bang bang sauce — a quick, crowd-pleasing weeknight favorite.

Air Fryer Honey Butter Garlic Chicken Tenders
Crispy air-fried chicken tenders coated in a sticky honey-butter garlic glaze — quick, family-friendly, and ready in about 25 minutes.
Did You Make This?
Leave a comment & rating below or tag @snapyrecipe on social media!
Rate This Recipe
Share This Recipe
Enjoyed this recipe? Share it with friends and family, and don't forget to leave a review!
Comments (1)
This recipe looks amazing! Can't wait to try it.
Comments are stored locally in your browser. Server comments are displayed alongside your local comments.
Hi, I'm Natalia!
What's Popular

Get My 30-Minute Meals email series!
Quick and easy dinner ideas delivered to your inbox.