
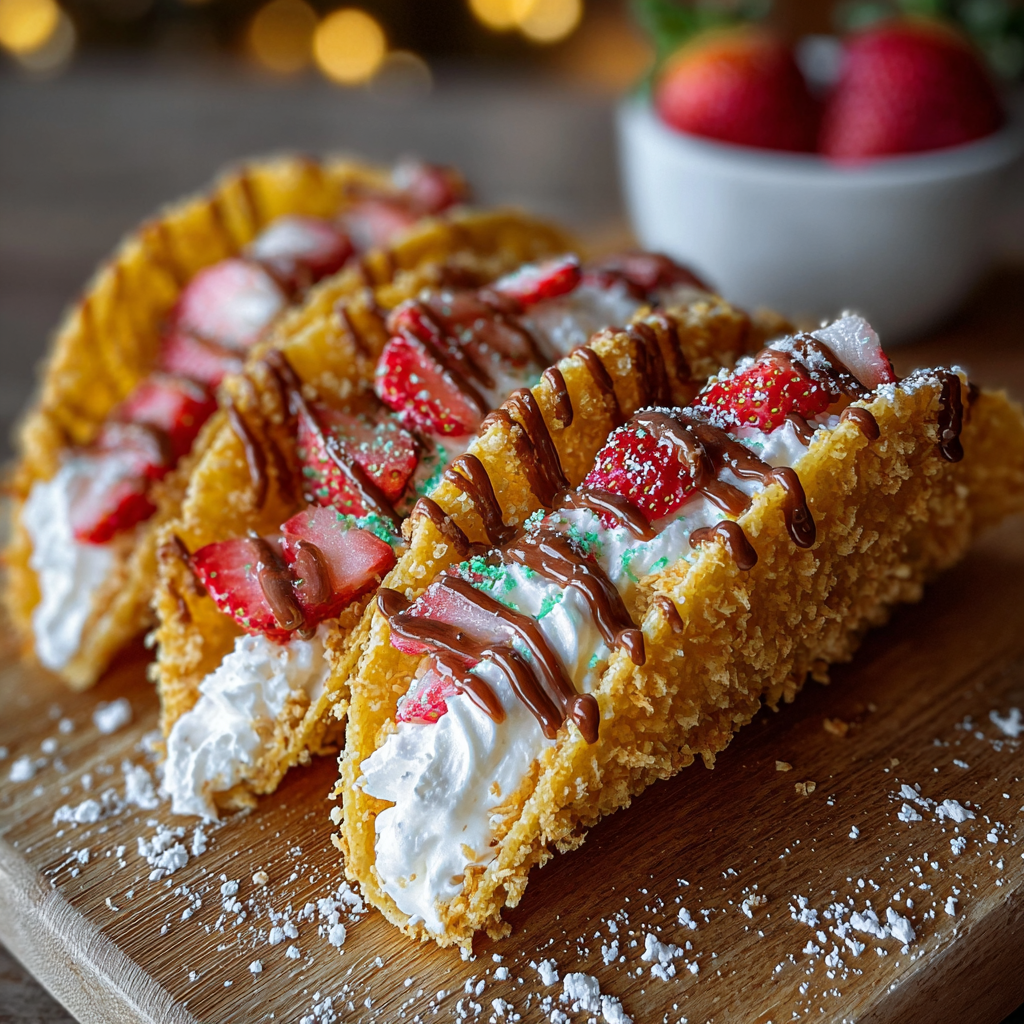
Cheesecake Tacos

A festive, playful twist on dessert — crisp white chocolate-coated tortilla shells filled with tangy cheesecake cream and topped with sprinkles, crushed candy canes, and M&M’s.

This festive twist on a sweet handheld is my answer to holiday parties and last-minute dessert cravings. I first made these cheesecake tacos one December when I needed something bright, colorful, and portable for a cookie swap. The idea of turning soft flour tortillas into crisp, shell-shaped vessels and coating them in white chocolate felt a little indulgent and a little silly — and that is exactly why it worked. The shells become delicately crisp with a thin candy coating that holds a pillowy, lightly sweetened filling, so every bite gives you crunch, cream, and nostalgic candy shop flavor.
What makes this dish special is the contrast of textures and the easy-to-love flavor profile. The cream cheese filling is lightened with heavy whipping cream until it tastes like a cloud of cheesecake; white chocolate and graham crumbs create a sweet, cookie-like shell; and crushed candy canes and sprinkles make each one unmistakably festive. I discovered this combination while riffing on a classic no-bake cheesecake and a taco-shaped cookie idea. Since then, these have become a holiday staple whenever friends or family gather — they disappear first every time.
Why You'll Love This Recipe
- Fast to assemble and crowd-pleasing: the shells bake in only 5 to 6 minutes and the filling whips up in 10 minutes, so you can have a tray ready in under an hour.
- Uses pantry staples and simple candy shop toppings: white chocolate, graham crumbs, and sprinkles are easy to source and give a big visual payoff.
- Make-ahead friendly: shells can be prepared a day early and refrigerated until the filling is ready, which makes assembly stress-free for parties.
- Handheld and portable: perfect for cookie swaps, potlucks, and kid-friendly gatherings where plates and forks are inconvenient.
- Highly customizable: swap the white chocolate for dark or milk chocolate, or change the garnish to suit the season or theme.
- Minimal equipment required: a muffin tin, cookie cutter, and pastry bag are all you need to get professional-looking results quickly.
I first served these at a holiday brunch and watched everyone — grandparents, toddlers, and picky teenagers — reach for seconds. There is something joyful about a dessert that feels like a novelty yet tastes familiar and comforting. Through a few batches I learned the ideal visual cues — lightly browned tortilla edges and a fully set chocolate coating — that make them both beautiful and sturdy enough to hold the filling.
Ingredients
- Flour tortillas (5 large): Choose room-temperature, pliable 8 to 10 inch tortillas so they cut cleanly and shape easily. I like a name-brand large flour tortilla for consistent thickness that crisps evenly.
- Unsalted butter (1 tablespoon): Melted and brushed on the cut circles to help them brown and take on a delicate crispness during the short bake.
- White chocolate (13 ounces), chopped: Use a good-quality white chocolate baking bar or chips; real white chocolate melts smoother than compound candy coating and gives a creamier flavor.
- Graham cracker crumbs (1 cup): For the cookie-like coating. You can buy crumbs or blitz whole crackers in a food processor for the freshest flavor.
- Christmas sprinkles (1/4 cup): Tiny nonpareils or jimmies for color and crunch. Use pastel or red-and-green for a holiday look or swap colors to match any theme.
- Crushed candy canes (2 tablespoons): Adds minty crunch and a festive look. Crush coarse for texture or fine for a dusted coating.
- Cream cheese (12 ounces), softened: Full-fat cream cheese gives the best texture and flavor. Let it sit at room temperature so it blends smooth with powdered sugar.
- Powdered sugar (2/3 cup): Sweetens and stabilizes the filling; sift it if it’s lumpy for a perfectly smooth cream.
- Vanilla extract (1 tablespoon): Pure vanilla deepens the cheesecake flavor; those little seeds are a nice touch, but extract is fine.
- Heavy whipping cream (1 cup): Whipped into the cream cheese to lighten the texture so the filling pipes neatly and tastes airy rather than dense.
- M&M’s (optional, for garnish): A light sprinkle on top adds color and an extra candy crunch; add to the grocery list if you want that candy-shop finish.
Instructions
Preheat and prepare the tin: Preheat the oven to 350 F (176 C). Turn a standard muffin tin upside down and set it on a baking sheet. The inverted tin creates the curved form needed to shape the tortillas into tacos while they bake; no special mold required. Cut and butter the shells: Using a 4-inch round cookie cutter, cut about three circles from each large flour tortilla. Brush both sides of each circle lightly with the melted unsalted butter so they brown evenly and crisp up in the oven. Shape and bake: Place each buttered circle over an indented section of the inverted muffin tin so the edges hang down and form a taco shape. Bake 5 to 6 minutes or until the edges show light golden-brown spots. Watch closely — tortillas can go from done to browned quickly. Cool in the tin: Remove from the oven and let the shells remain on the inverted tin until cool enough to handle. This helps them set in the curved shape instead of flattening as they cool. Prepare coating mix: In a shallow bowl, stir together graham cracker crumbs, Christmas sprinkles, and crushed candy canes. The mixture should be slightly coarse so the melted chocolate has something to adhere to. Melt the chocolate: Melt the chopped white chocolate gently over a double boiler or in 20- to 30-second intervals in the microwave, stirring between intervals until smooth. Remove from heat and keep slightly warm for brushing. Coat and crumb: Brush the cooled shells evenly with melted white chocolate, then immediately press each shell into the graham mixture so the coating sticks. Place the coated shells on a parchment-lined baking sheet and refrigerate until the chocolate sets, about 10 to 15 minutes. Make the filling: In a mixing bowl, beat softened cream cheese with powdered sugar and vanilla until completely smooth. Add cold heavy whipping cream and continue beating on medium-high speed until the mixture holds soft peaks and becomes pipeable. Chill briefly if it seems too soft to pipe. Assemble and garnish: Fit a piping bag with a large round or star tip and fill with the cheesecake filling. Pipe a generous swirl into each shell. Top each with extra sprinkles, crushed candy canes, and a few M&M’s. Refrigerate for 15 to 20 minutes to firm the filling before serving.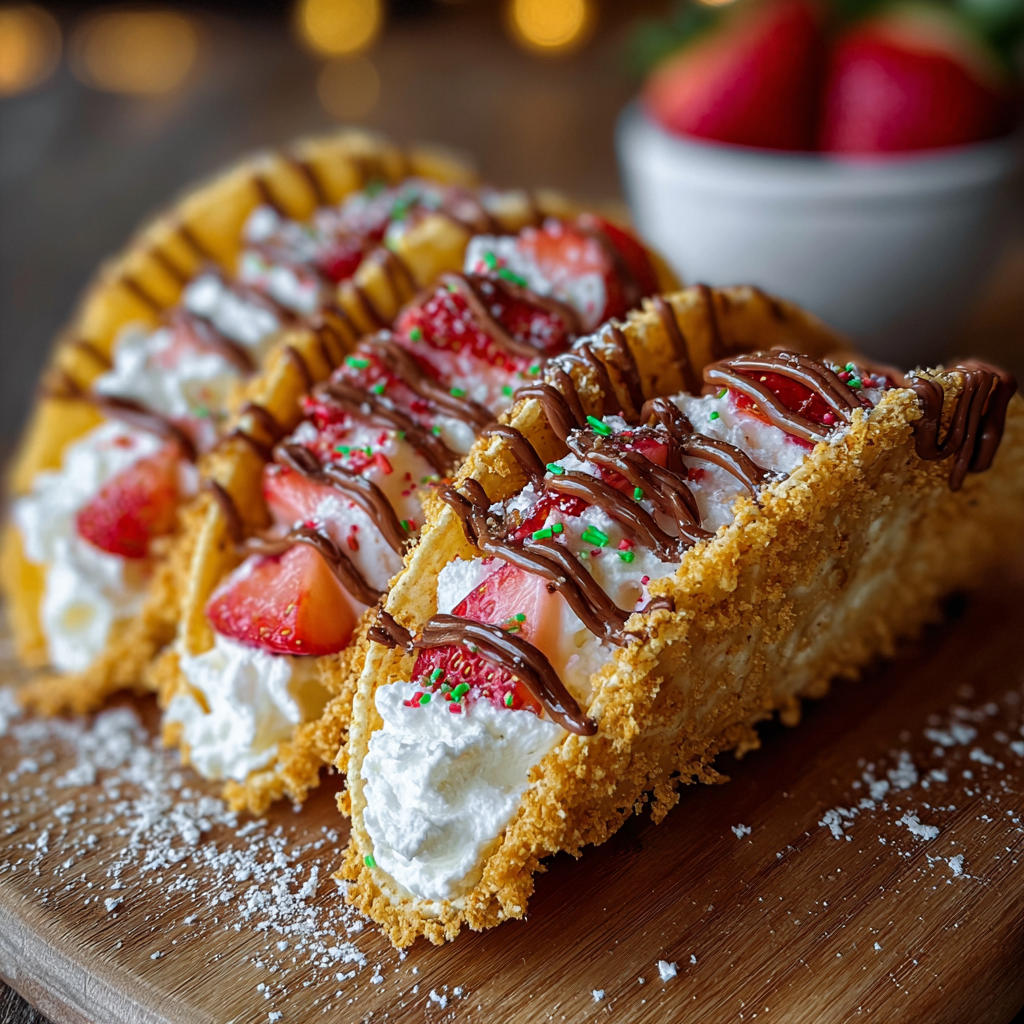
You Must Know
- The shells are fragile until fully chilled; refrigerate after coating so the chocolate sets and strengthens the shell.
- These keep well in the refrigerator for up to 48 hours but are best eaten within a day to preserve crispness.
- Make the shells a day ahead and store them airtight; assemble the filling and pipe shortly before serving to maintain texture contrast.
- High in calories and rich in dairy: one taco is indulgent, so they work best as small dessert portions or party bites.
My favorite part of this creation is the way the white chocolate gives a subtle vanilla-sweet edge that pairs perfectly with the tangy cream cheese filling. Guests always comment on the novelty of eating a taco-shaped dessert, and I love seeing the surprised looks followed by satisfied smiles. Small technique notes: don’t overbake the shells and be gentle when coating them so they don’t crack.
Storage Tips
Store assembled tacos in an airtight container in the refrigerator for up to 48 hours. Place parchment or wax paper between layers to prevent sticking. If you need to keep shells longer, store the coated but unfilled shells in an airtight container in the fridge for up to 3 days or freeze them flat in a single layer for up to 1 month; thaw in the refrigerator before filling. Reheat is unnecessary — filling is best chilled — but if the shells lose crispness slightly after refrigeration, let them sit at room temperature 10 minutes before serving to regain a bit of snap.
Ingredient Substitutions
Swap the white chocolate for milk or dark chocolate for a richer shell; tempering helps if you want a glossy finish but is not required for small batches. For a gluten-free version use gluten-free flour tortillas and gluten-free graham crumbs. Replace heavy cream with chilled coconut cream for a dairy-free twist and use a dairy-free cream cheese alternative, though texture will be softer. If candy canes aren’t available, chopped peppermint bark or crushed freeze-dried raspberries provide a similar crunchy accent.
Serving Suggestions
Serve these as a festive dessert platter with a variety of garnishes so guests can customize: extra sprinkles, chopped nuts, salted caramel drizzle, or fresh berries complement the creamy filling. They pair nicely with a cup of espresso, hot cocoa, or a mulled wine for holiday gatherings. For a brunch feeling, offer them alongside mini fruit cups and a light citrus salad to cut through the richness.
Cultural Background
These playful handhelds are rooted in two traditions: the American love of no-bake cheesecake and the modern trend of reshaping familiar foods into novelty forms. While tacos are a savory staple in Mexican and Tex-Mex cuisines, dessert tacos have become a contemporary American creation, often seen at festivals and themed parties. This recipe celebrates culinary crossover — a whimsical reinterpretation rather than a traditional dish — and highlights how technique (shaping tortillas and using chocolate coatings) can transform texture and presentation.
Seasonal Adaptations
For winter holidays keep the peppermint and red-green sprinkles, and consider adding warm spices to the graham coating like 1/4 teaspoon cinnamon or ginger. For spring switch to lemon zest in the filling and swap candy canes for freeze-dried strawberries and pastel sprinkles. In summer use dark chocolate and top with fresh berries and mint. The concept adapts easily: change the coating and garnish to match seasonal flavors while keeping the core technique the same.
Meal Prep Tips
Plan the work in three steps to save time: make and bake all shells first, melt and apply the chocolate coating next, and prepare the filling last. Store coated shells separately and pipe filling the morning of your event. Use disposable piping bags for quick cleanup, and keep extra fillings chilled in the refrigerator to re-pipe if needed. For large batches enlist a helper to press shells into crumbs and plate finished tacos as you assemble them.
These cheesecake tacos are a guaranteed conversation-starter and a joyful way to bring a familiar flavor to a new shape. Whether you serve them at holiday gatherings or as a fun dessert for a casual get-together, they invite creativity and sharing — and they disappear fast.
Pro Tips
Work with room-temperature cream cheese to avoid lumps in the filling and to achieve a smooth consistency.
Brush tortillas with melted butter sparingly — too much will make them greasy and soggy instead of crisping up.
Chill coated shells until the white chocolate fully sets; this prevents cracking when filling.
If the filling feels too soft to pipe, chill it for 10 to 15 minutes to firm up before piping.
This nourishing cheesecake tacos recipe is sure to be a staple in your kitchen. Enjoy every moist, high protein slice — it is perfect for breakfast or as a wholesome snack any time.
FAQs about Recipes
Can I make the shells ahead of time?
Yes. Prepare shells up to 3 days ahead; store refrigerated in an airtight container. Fill and garnish shortly before serving for the best texture.
How can I adapt this for dietary restrictions?
Swap white chocolate for dark or milk chocolate and use gluten-free tortillas to make a gluten-free version. For dairy-free, try coconut cream and dairy-free cream cheese substitutes.
Tags
Cheesecake Tacos
This Cheesecake Tacos recipe makes perfectly juicy, tender, and flavorful steak every time! Serve with potatoes and a side salad for an unforgettable dinner in under 30 minutes.
Ingredients
Shells
Coating
Filling
Garnish
Instructions
Preheat and prepare the tin
Preheat the oven to 350 F (176 C). Turn a standard muffin tin upside down and set it aside on a baking sheet to shape the tortilla circles into taco shells.
Cut and butter tortillas
Use a 4-inch cookie cutter to cut about three circles per large tortilla. Brush both sides of each circle lightly with melted unsalted butter to encourage even browning and crisping.
Shape and bake shells
Drape each buttered circle over the inverted muffin tin wells to form a taco shape. Bake for 5 to 6 minutes or until edges are lightly browned, watching carefully to prevent over-browning.
Cool shells in the tin
Allow shells to cool on the inverted tin so they set in the curved shape rather than flattening as they cool to room temperature.
Prepare coating mixture
In a shallow bowl combine graham cracker crumbs, Christmas sprinkles, and crushed candy canes so the melted chocolate has texture to adhere to.
Melt white chocolate
Melt the chopped white chocolate over a double boiler or in short bursts in the microwave, stirring until smooth and slightly warm for brushing.
Coat shells and set
Brush cooled shells with the melted white chocolate and immediately press into the graham mixture. Place on parchment and refrigerate until the chocolate solidifies, about 10 to 15 minutes.
Make cheesecake filling
Beat softened cream cheese with powdered sugar and vanilla until smooth. Add cold heavy whipping cream and beat until the mixture holds soft peaks and is pipeable.
Pipe filling and garnish
Transfer filling to a piping bag and pipe into each shell. Sprinkle with extra sprinkles, crushed candy canes, and M&M’s. Chill 15 to 20 minutes to firm before serving.
Last Step: Please leave a rating and comment letting us know how you liked this recipe! This helps our business to thrive and continue providing free, high-quality recipes for you.
Nutrition
Did You Make This?
Leave a comment & rating below or tag
@snapyrecipe on social media!
Categories:
You might also like...

5-Minute Thanksgiving Appetizers That Wow Every Guest
A fast, elegant bite for Thanksgiving: creamy cheese, bright cranberry, crunchy pecans and rosemary on crackers or baguette — ready in five minutes and loved by all.

Air Fryer Bang Bang Chicken Skewers
Crispy air-fried chicken skewers tossed in a creamy, sweet-spicy bang bang sauce — a quick, crowd-pleasing weeknight favorite.

Air Fryer Honey Butter Garlic Chicken Tenders
Crispy air-fried chicken tenders coated in a sticky honey-butter garlic glaze — quick, family-friendly, and ready in about 25 minutes.
Did You Make This?
Leave a comment & rating below or tag @snapyrecipe on social media!
Rate This Recipe
Share This Recipe
Enjoyed this recipe? Share it with friends and family, and don't forget to leave a review!
Comments (1)
This recipe looks amazing! Can't wait to try it.
Comments are stored locally in your browser. Server comments are displayed alongside your local comments.
Hi, I'm Natalia!
What's Popular

Get My 30-Minute Meals email series!
Quick and easy dinner ideas delivered to your inbox.