
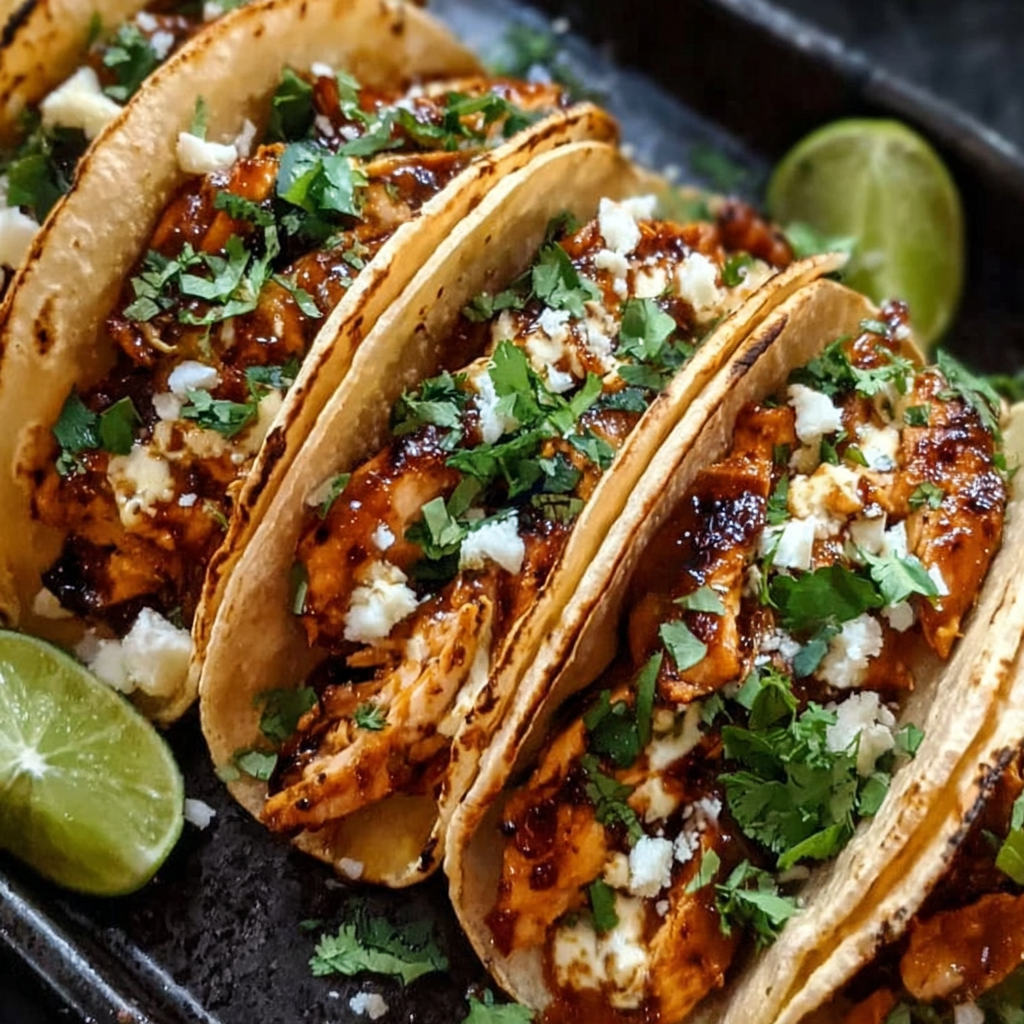
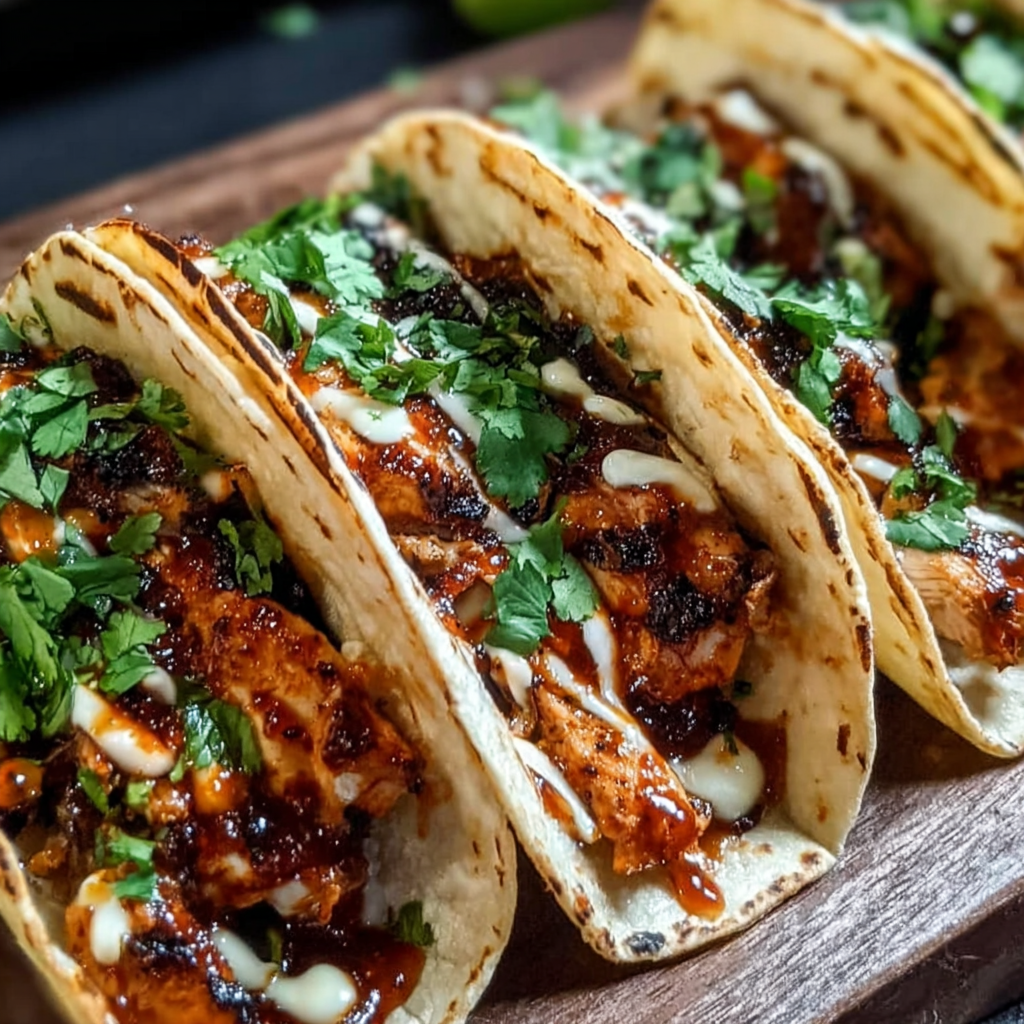
Garlic Butter Honey BBQ Chicken Tacos

Sweet, savory, and buttery chicken tucked into warm tortillas with crisp toppings — a fast, family-friendly taco that elevates weeknight dinner.
Why You'll Love This Recipe
- The glaze is irresistibly glossy and clings to the chicken, giving you sweet, savory, and slightly smoky bites in every taco.
- Ready in about 30 minutes from start to finish, making it ideal for busy weeknights or last-minute guests.
- Uses pantry-friendly ingredients: butter, garlic, honey, and your favorite BBQ sauce — no complicated shopping necessary.
- Highly adaptable: swap tortillas, cheese, or greens to suit dietary needs, and it reheats very well for lunches.
- Crowd-pleasing texture contrasts: juicy chicken, creamy cheese, crunchy onions, and bright cilantro and lime on top.
- Make-ahead friendly: cook chicken and sauce in advance, then reheat quickly and assemble when ready to serve.
My family reaction is always immediate approval. My youngest once declared these the "best sticky tacos ever," and our neighbors asked for the sauce recipe at a block party. Over several versions I learned to keep the heat gentle so the honey doesn’t scorch and to always rest the chicken before slicing to retain juiciness. Those small adjustments make a big difference in texture and presentation.
Ingredients
- Chicken (1 lb): Choose boneless, skinless chicken breasts or thighs. Breasts are leaner and slice very neatly; thighs are more forgiving and stay juicier if you tend to overcook. Look for fresh, evenly sized pieces so they cook at the same rate.
- Olive oil (2 tbsp): Use extra-virgin or regular olive oil to help the seasoning adhere and to promote a good sear. A neutral oil like canola works too if you prefer.
- Seasonings: Salt, black pepper, paprika (1 tsp), garlic powder (1 tsp), onion powder (1 tsp), and optional chili powder (1/2 tsp) add depth and a little warmth; adjust the chili powder to control heat.
- Butter (4 tbsp): Unsalted butter creates the rich base of the sauce and helps the garlic bloom without burning. If you only have salted butter, reduce added salt to taste.
- Garlic (4 cloves): Fresh minced garlic is essential for fragrance and flavor; avoid garlic powder here because the fresh aromatics make the sauce sing.
- Honey (2 tbsp): Adds glossy sweetness. Use mild-tasting honey so flavors remain balanced. Local wildflower honey works beautifully.
- BBQ sauce (1/3 cup): Pick a brand you love. A balanced, slightly tangy variety works best. If your BBQ sauce is very sweet, reduce honey by 1/2 tablespoon.
- Lemon juice (1 tbsp): Brightens the sauce and cuts richness. Freshly squeezed is best.
- Tortillas (8): Small flour or corn tortillas, warmed. Flour tortillas are softer and more pliable; corn tortillas give a touch of texture and are naturally gluten-free.
- Toppings: Shredded lettuce (1/2 cup), shredded cheese (1/2 cup cheddar or Monterey Jack), diced red onion (1/4 cup), chopped cilantro (1/4 cup), and lime wedges for finishing.
Instructions
Step 1: Season the chicken Pat 1 pound of chicken dry with paper towels to ensure a good sear. Rub with 2 tablespoons olive oil, then season evenly with salt, pepper, 1 teaspoon paprika, 1 teaspoon garlic powder, 1 teaspoon onion powder, and 1/2 teaspoon chili powder if using. The oil helps the spices toast and form a flavorful crust. Step 2: Cook the chicken Heat a large skillet over medium-high heat until hot but not smoking. Add the seasoned chicken and cook 5 to 6 minutes per side, depending on thickness, until the internal temperature reaches 165 degrees F and juices run clear. Avoid constantly flipping; let a crust form. Transfer to a cutting board and rest for 5 minutes before slicing thinly across the grain for tenderness. Step 3: Make the sauce In the same skillet over medium heat, melt 4 tablespoons unsalted butter. Add 4 cloves minced garlic and cook 30 to 45 seconds until fragrant, stirring so it doesn’t brown. Stir in 2 tablespoons honey and 1/3 cup of your favorite BBQ sauce; simmer gently for about 2 minutes to combine flavors. Remove from heat and whisk in 1 tablespoon lemon juice for brightness. Taste and adjust salt, honey, or BBQ sauce for balance. Step 4: Toss chicken in the glaze Add the sliced chicken back to the skillet and toss gently until each piece is coated in the glossy sauce. Return to low heat for 30 to 60 seconds if you want the sauce to reduce and cling more tightly, but do not overcook the chicken to prevent dryness. Step 5: Warm tortillas and assemble Warm 8 small tortillas in a dry skillet or wrapped in a damp towel in the oven for a few minutes. Place warmed tortillas on a board, add a layer of shredded lettuce, a few slices of the glazed chicken, a sprinkle of shredded cheese, diced red onion, and chopped cilantro. Squeeze lime over each taco before serving. Step 6: Serve Serve immediately while the chicken is hot and the tortillas are soft. Offer lime wedges and extra BBQ sauce at the table for anyone who likes more sauciness.
You Must Know
- The tacos keep well refrigerated for up to 3 days if you store chicken and toppings separately to preserve tortilla texture.
- Freezing cooked chicken in the sauce is possible for up to 2 months; thaw overnight in the refrigerator and reheat gently so the butter doesn’t separate.
- This dish is relatively high in fat because of butter and cheese; swapping to reduced-fat cheese and halving butter lowers calories.
- These tacos are high in protein and make a satisfying lunch or dinner with roughly 600 kcal per serving when divided into four portions.
My favorite part of this combination is the quick caramelization that happens when the honey hits the hot butter. It creates little browned edges on the chicken that catch the light and add texture. At a recent potluck, someone told me that the glaze tasted "like a backyard barbecue tucked into a taco," which perfectly sums up its appetite appeal. I also learned that resting the chicken after searing is nonnegotiable if you want juicy slices rather than dry shreds.
Storage Tips
Store leftover glazed chicken in an airtight container in the refrigerator for up to three days. Keep tortillas and crunchy toppings like lettuce and onion in a separate container to avoid limp shells. For longer storage, freeze the sauced chicken in a freezer-safe bag or container for up to two months; remove as much air as possible to prevent freezer burn. When reheating, thaw overnight in the fridge if frozen and reheat gently in a skillet over low heat with a splash of water or a pat of butter to bring the sauce back to life. Avoid microwaving on high, which can dry the chicken and separate the butter.
Ingredient Substitutions
If you want to reduce dairy, substitute 2 tablespoons of olive oil for half the butter and add a teaspoon of cornstarch dissolved in cold water to thicken the sauce slightly. For a gluten-free version, choose corn tortillas and verify that your BBQ sauce is gluten-free. Swap chicken for shrimp, using a shorter cook time of 1 to 2 minutes per side, or use tofu for a vegetarian option but note honey is not vegetarian-friendly to some; replace honey with maple syrup to keep it vegan-friendly. If your BBQ sauce is very sweet, cut honey to 1 tablespoon and add 1/2 teaspoon apple cider vinegar to maintain balance.
Serving Suggestions
Serve these tacos with simple sides like cilantro-lime rice, black beans, or a crisp cabbage slaw to add acid and crunch. Garnish with extra cilantro and lime for freshness. For a party, set up a taco bar with warm tortillas, extra BBQ sauce, pickled jalapeños, avocado slices, and a bowl of crema or sour cream to let guests customize. Pair with a cold lager, a sparkling citrus soda, or an easy blanco wine for a bright contrast to the buttery glaze.
Meal Prep Tips
This is a terrific meal-prep option: cook and slice the chicken, make the sauce, and store them together or separately. Portion into four containers with tortillas stored in a sealed bag and greens in their own compartment to maintain crispness. Reheat portions in a skillet for best texture, add fresh toppings after reheating, and finish with a squeeze of lime. Preparing components on a Sunday means quick lunches and dinners all week.
Seasonal Adaptations
For spring and summer, add fresh mango salsa or diced peaches to the toppings for a bright, fruity contrast. In colder months, switch shredded lettuce for quick-pickled red cabbage and add roasted corn for a heartier feel. During tailgate season, double the sauce and use it as a dip for nachos or slider buns to stretch the flavors across many servings.
These tacos are simple to scale and adapt, and they reward small techniques like resting meat, warming tortillas properly, and tasting the sauce at each stage. Whether as a busy weeknight dinner or a friendly backyard meal, they invite customization and quick satisfaction. Give them a try and make them your own; I promise they will become a repeat in your rotation.
Pro Tips
Pat chicken dry before seasoning to ensure a good sear and crust formation.
Rest cooked chicken for at least 5 minutes before slicing to lock in juices.
Don’t let garlic brown when making the sauce; cook just until fragrant to avoid bitterness.
Warm tortillas over a dry skillet or wrapped in foil in a low oven to improve pliability.
Taste the sauce before tossing; adjust honey or lemon to achieve the right balance of sweet and bright.
This nourishing garlic butter honey bbq chicken tacos recipe is sure to be a staple in your kitchen. Enjoy every moist, high protein slice — it is perfect for breakfast or as a wholesome snack any time.
FAQs about Recipes
Can I freeze the cooked chicken?
Yes. Cooked chicken with the sauce can be frozen for up to 2 months. Thaw overnight in the refrigerator and reheat gently over low heat.
How do I make this gluten-free?
Use corn tortillas and verify the BBQ sauce is gluten-free. Avoid flour tortillas to keep it gluten-free.
Can I make this vegan?
Yes. Replace honey with maple syrup and use vegan butter to make a plant-based version, and substitute tofu or tempeh for chicken.
Tags
Garlic Butter Honey BBQ Chicken Tacos
This Garlic Butter Honey BBQ Chicken Tacos recipe makes perfectly juicy, tender, and flavorful steak every time! Serve with potatoes and a side salad for an unforgettable dinner in under 30 minutes.
Ingredients
Protein
Seasoning
Sauce
Assembly
Instructions
Season the chicken
Pat chicken dry and rub with olive oil. Season evenly with salt, pepper, paprika, garlic powder, onion powder, and optional chili powder.
Cook the chicken
Heat a large skillet over medium-high heat. Cook chicken 5 to 6 minutes per side until internal temperature reaches 165 degrees F. Rest 5 minutes before slicing.
Make the sauce
In the same skillet, melt butter and sauté minced garlic until fragrant. Stir in honey and BBQ sauce and simmer 2 minutes. Whisk in lemon juice.
Coat the chicken
Add sliced chicken to the skillet and toss until evenly coated with the glaze. Warm briefly to allow the sauce to cling to the chicken.
Warm tortillas and assemble
Warm tortillas, then layer with lettuce, glazed chicken, cheese, onion, and cilantro. Finish with a squeeze of lime.
Serve
Serve immediately with extra BBQ sauce and lime wedges alongside. Store leftovers in separate containers for best texture.
Last Step: Please leave a rating and comment letting us know how you liked this recipe! This helps our business to thrive and continue providing free, high-quality recipes for you.
Nutrition
Did You Make This?
Leave a comment & rating below or tag
@snapyrecipe on social media!
Categories:
You might also like...

5-Minute Thanksgiving Appetizers That Wow Every Guest
A fast, elegant bite for Thanksgiving: creamy cheese, bright cranberry, crunchy pecans and rosemary on crackers or baguette — ready in five minutes and loved by all.

Air Fryer Bang Bang Chicken Skewers
Crispy air-fried chicken skewers tossed in a creamy, sweet-spicy bang bang sauce — a quick, crowd-pleasing weeknight favorite.

Air Fryer Honey Butter Garlic Chicken Tenders
Crispy air-fried chicken tenders coated in a sticky honey-butter garlic glaze — quick, family-friendly, and ready in about 25 minutes.
Did You Make This?
Leave a comment & rating below or tag @snapyrecipe on social media!
Rate This Recipe
Share This Recipe
Enjoyed this recipe? Share it with friends and family, and don't forget to leave a review!
Comments (1)
This recipe looks amazing! Can't wait to try it.
Comments are stored locally in your browser. Server comments are displayed alongside your local comments.
Hi, I'm Natalia!
What's Popular

Get My 30-Minute Meals email series!
Quick and easy dinner ideas delivered to your inbox.